MTM – Master the Mainframe 2019 – Part 2 Challenge 1 Solution
In my previous post, I gave you the solution for Part 1 of MTM 2019. In this post, I will give you the solution of Part 2 Challenge 1 of Master the Mainframe (MTM) 2019. This challenge will teach you the basics of TSO/ISPF Navigation on z/OS. This challenge will only give you a little exposure to TSO/ISPF. In the later challenges, we will deal with TSO/ISPF in detail.
Table of Contents
Introduction to MTM Part 2
Part 2 of the challenge will give you hands-on experience of many subsystems as well as technologies of z/OS. These include TSO/ISPF, JCL, SDSF, System Log, System commands, System utilities, Unix system services, etc.
Challenge 1 is all about TSO – Time Sharing Option.
Before we proceed, please note that i have also made a video lecture of this post. So, if you prefer watching a video tutorial instead of reading a post then you can go to the below link. It contains the same post but in a video tutorial format.
TSO Tasks
Log in to the TSO. Now give the below command:
PFSHOW OFF
![PFSHOW OFF command will hide the Function keys at the bottom of the screen](https://mainframenation.com/wp-content/uploads/2020/06/PFSHOW-OFF-command-will-hide-the-Function-keys-at-the-bottom-of-the-screen.png)
![Function Keys are now hidden](https://mainframenation.com/wp-content/uploads/2020/06/Function-Keys-are-now-hidden.png)
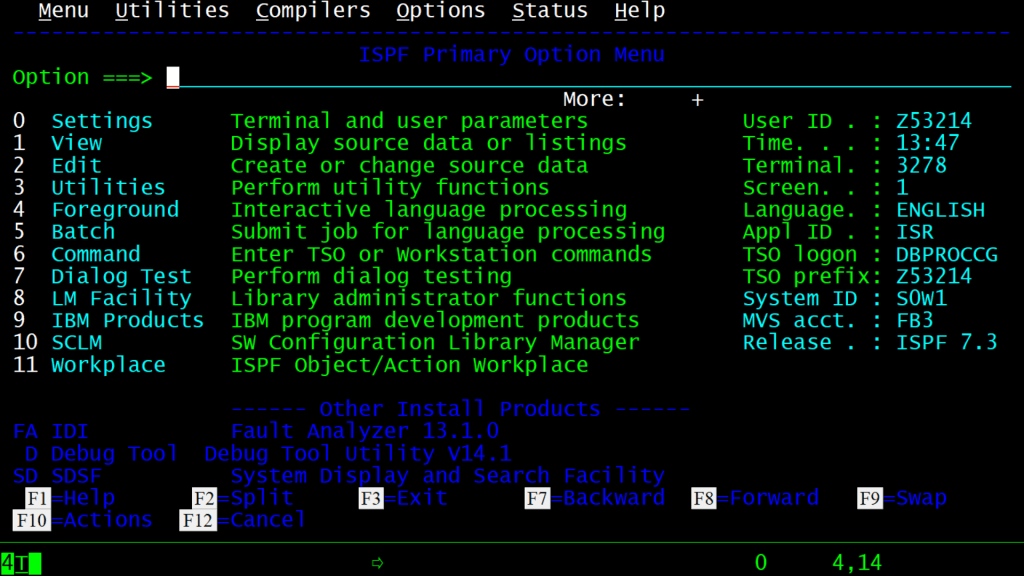
This will hide the Function keys at the bottom of the screen. Now enter the command ‘x’ on the ISPF Primary option menu.
![Give x in ISPF Primary options menu](https://mainframenation.com/wp-content/uploads/2020/06/Give-x-in-ISPF-Primary-options-menu.png)
If a screen like this appears then give the option 2.
![Give option 2 if a screen like this appears](https://mainframenation.com/wp-content/uploads/2020/06/Give-option-2-if-a-screen-like-this-appears.png)
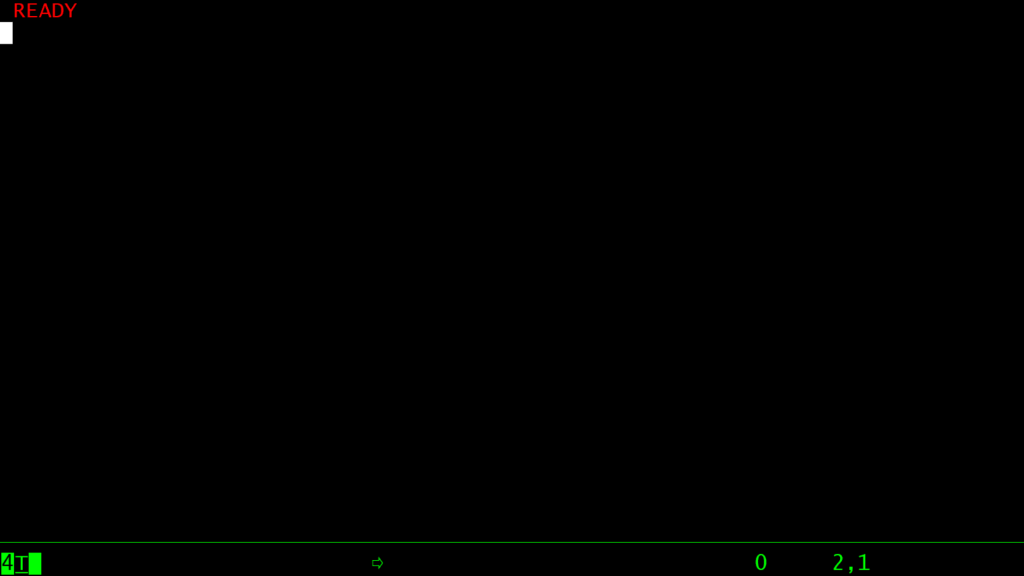
TSO READY prompt will now appear.
![TSO READY prompt](https://mainframenation.com/wp-content/uploads/2020/06/TSO-READY-prompt.png)
Completing Challenge 1 of MTM 2019
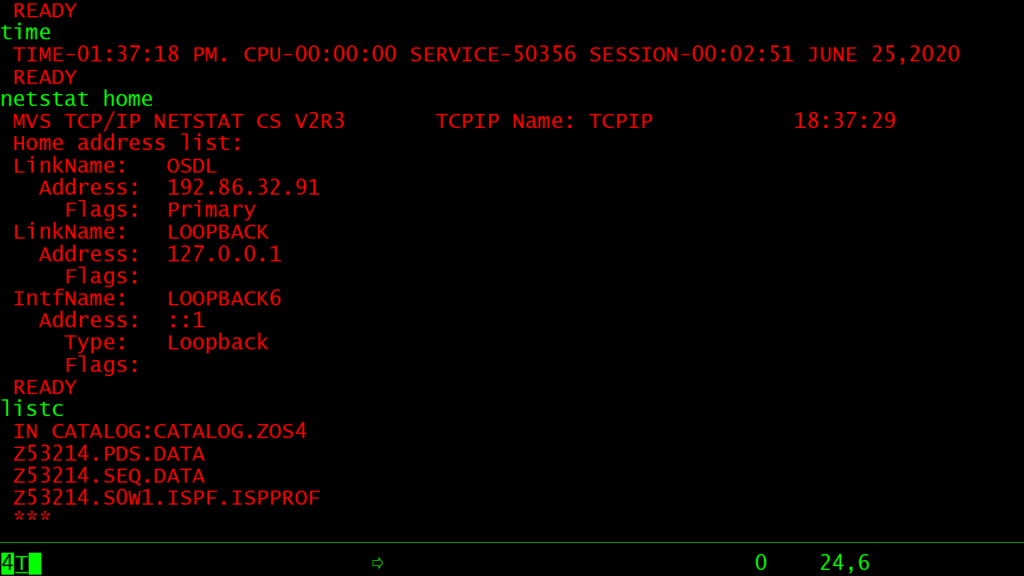
Enter the command time on the READY prompt and press the ENTER key.
TIME
![TIME command will show DATE and TIME of the MTM system](https://mainframenation.com/wp-content/uploads/2020/06/TIME-command-will-show-DATE-and-TIME-of-the-MTM-system.png)
Now enter the command netstat home. It will display the system IP address.
netstat home
![NETSTAT HOME will display the network statistics of MTM system](https://mainframenation.com/wp-content/uploads/2020/06/NETSTAT-HOME-will-display-the-network-statistics-of-MTM-system.png)
Enter the command listc. It will display the current list of your personal data sets.
listc
![listc command to display catalog information of your datasets allocated on the MTM system](https://mainframenation.com/wp-content/uploads/2020/06/listc-command-to-display-catalog-information-of-your-datasets-allocated-on-the-MTM-system.png)
Execute the below command now. It will allocate data sets on the system.
submit 'zos.public.jcl(part2)'
Enter a when it asks for Jobname character.
![Submit JCL to allocate part 2 datasets](https://mainframenation.com/wp-content/uploads/2020/06/Submit-JCL-to-allocate-part-2-datasets.png)
Now enter listc again to see the list of your personal data sets. You will see the below output.
![Give LISTC again to list all your datasets on the MTM system](https://mainframenation.com/wp-content/uploads/2020/06/Give-LISTC-again-to-list-all-your-datasets-on-the-MTM-system.png)
The below command will submit a background job which executes the same commands.
submit 'zos.public.jcl(tsojcl)'
Give b when it asks for Jobname character.
![Execute TIME, NETSTAT HOME and LISTC in background using this command](https://mainframenation.com/wp-content/uploads/2020/06/Execute-TIME-NETSTAT-HOME-and-LISTC-in-background-using-this-command.png)
Now enter ISPF again to go to the ISPF primary options menu.
![Go to ISPF primary options menu by giving the ISPF command](https://mainframenation.com/wp-content/uploads/2020/06/Go-to-ISPF-primary-options-menu-by-giving-the-ISPF-command.png)
Give PFSHOW ON again to display function keys at the bottom of the list.
PFSHOW ON
![PFSHOW ON command to display the function keys at the bottom](https://mainframenation.com/wp-content/uploads/2020/06/PFSHOW-ON-command-to-display-the-function-keys-at-the-bottom.png)
![Function keys are now visible again at the bottom](https://mainframenation.com/wp-content/uploads/2020/06/Function-keys-are-now-visible-again-at-the-bottom.png)
Verify Successful completion of Challenge 1
Follow the below steps to verify that your Challenge 1 has completed successfully. Enter the below command on your command line:
dslist p2.output
![](https://mainframenation.com/wp-content/uploads/2020/06/dslist-command-to-view-p2.output-dataset.png)
Give b in front of the P2.OUTPUT dataset to browse the content of this dataset.
![browse the p2.output dataset](https://mainframenation.com/wp-content/uploads/2020/06/browse-the-p2.output-dataset.png)
In the next screen give s in front of #01
![Select #01 member of this dataset](https://mainframenation.com/wp-content/uploads/2020/06/Select-01-member-of-this-dataset.png)
If your dataset contains the below data then your challenge was successful.
![Content of the P2.OUTPUT(#01) dataset](https://mainframenation.com/wp-content/uploads/2020/06/Content-of-the-P2.OUTPUT01-dataset.png)
That is it !!!
In the next post, we will solve Part 2 Challenge 2.
See you there !!!
Leave a Reply