
SDSF – Master the Mainframe 2019 – Part 2 Challenge 2 solution
In my previous post we solved Challenge 1 which introduced us to TSO/ISPF. In Challenge 2 we will learn about SDSF. That is System Display and Search Facility. So, Let’s start.
Please note that I have also made a video lecture on this post. So, if you like video tutorials instead of reading a post, then you can go to the below link to watch the video.
Table of Contents
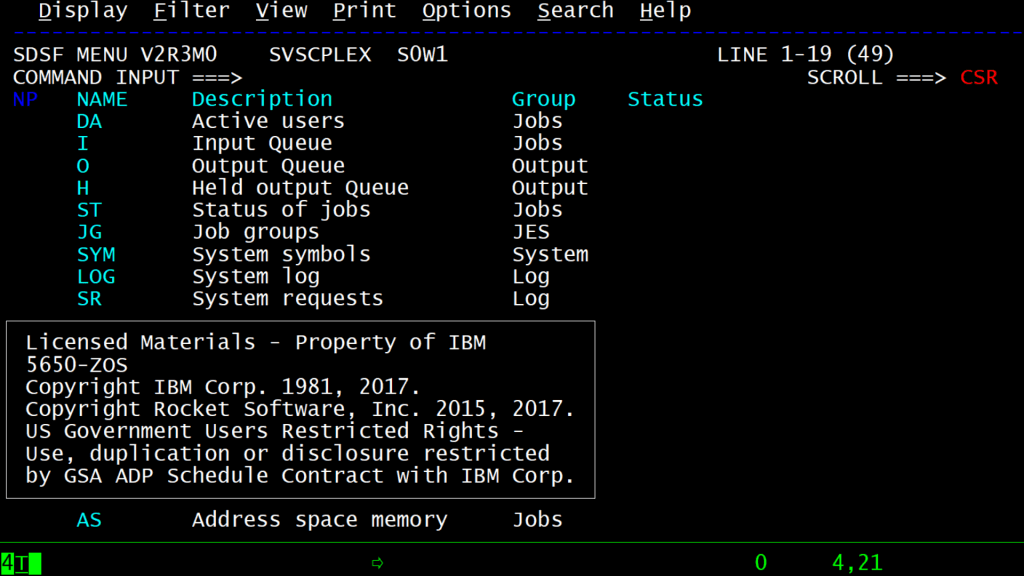
What is SDSF?
SDSF is a panel driven interface. So, just like ISPF, we can navigate through it by giving commands, numbers, or menu shortcuts such as ‘st’ which will take us to the status of jobs. IBM has also made a video explaining this topic. So, I recommend that you go to the below link and watch it before proceeding further.
http://mtm2019.mybluemix.net/part_two/part_two_ch02.html
Let’s solve Part 2 Challenge 2
Log in to the TSO environment. Then give the command sd to go to SDSF.
sd

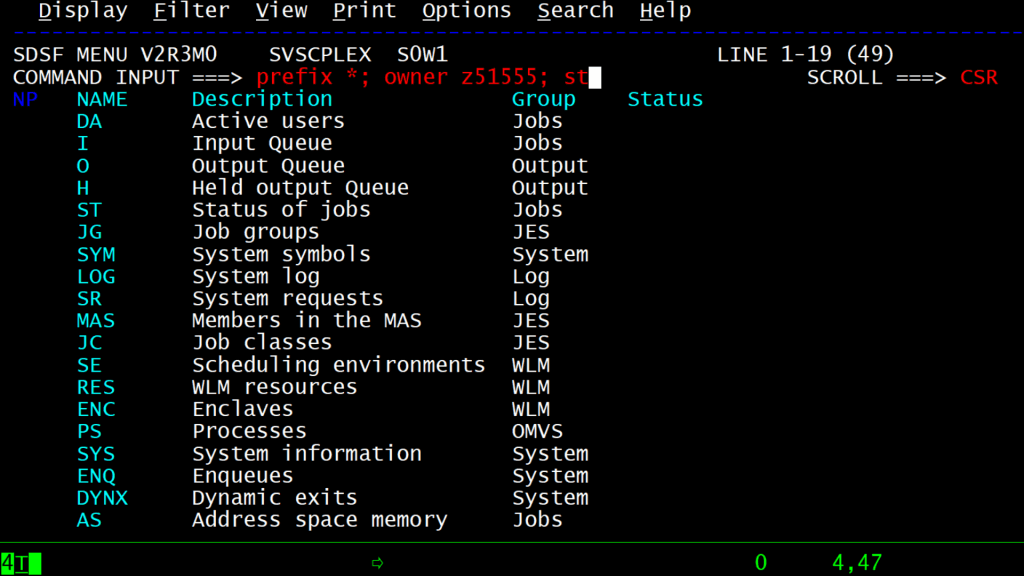
Then, Enter the below command
prefix *; owner z51555; st
Prefix * will display all the jobs.
Owner z51555 means show all the job owned by z51555 -- remember to replace z51555 with your id
st will display status of jobs
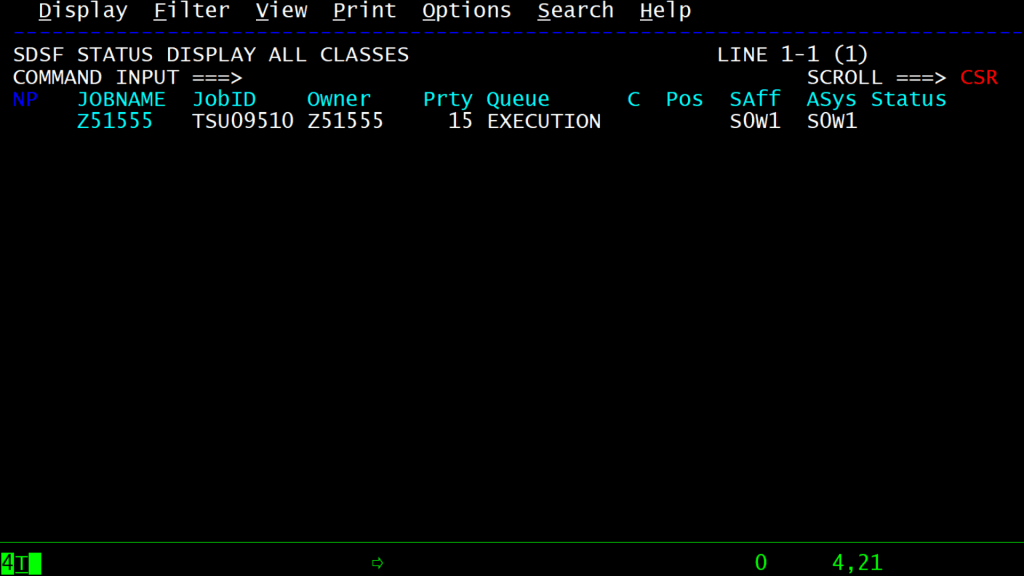
Then, submit the below command:
tso submit 'zos.public.jcl(pgm01a)'

When it asks for a jobname character then enter c and press the ENTER key.
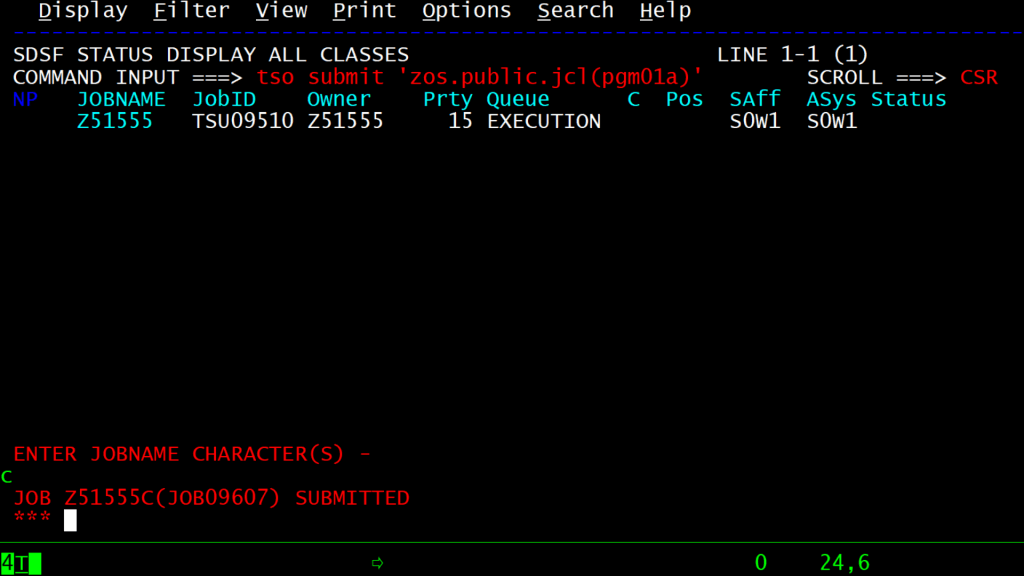

You will now see a new job Z5155C.

Go to the front of this job and give a ?

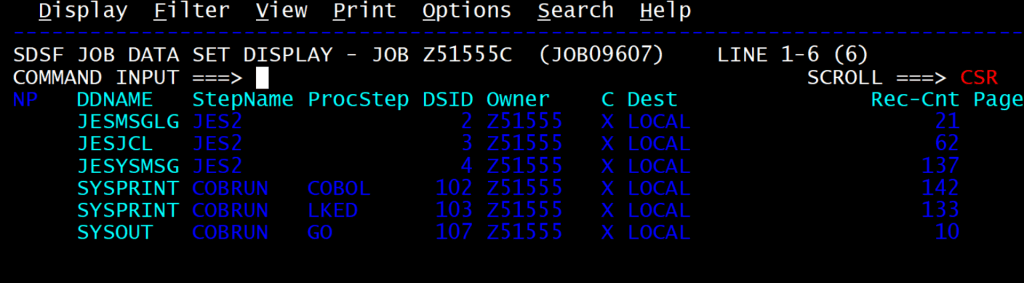
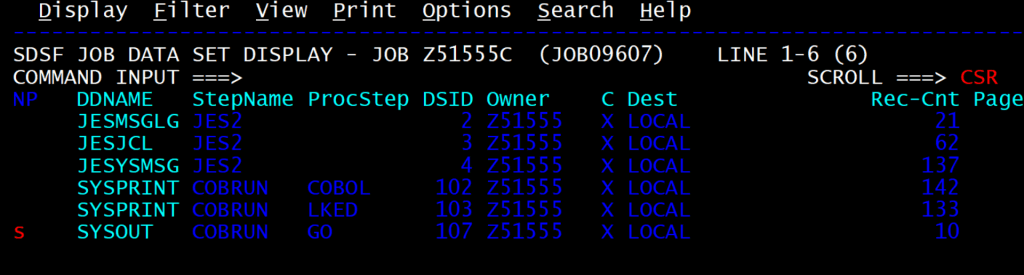
So, you now see the job output. Also, to see the details of any DDNAME just give s in front of it, like shown below:
Task to complete Part 2 Challenge 2
So, this is the final task to complete Challenge 2 of part 2. All you have to do is copy SYSOUT to another dataset called P2.OUTPUT(#02).
So go in front of SYSOUT and give xdc in the NP column
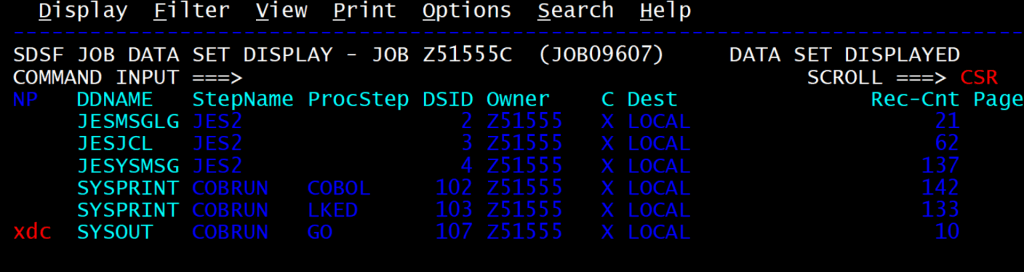
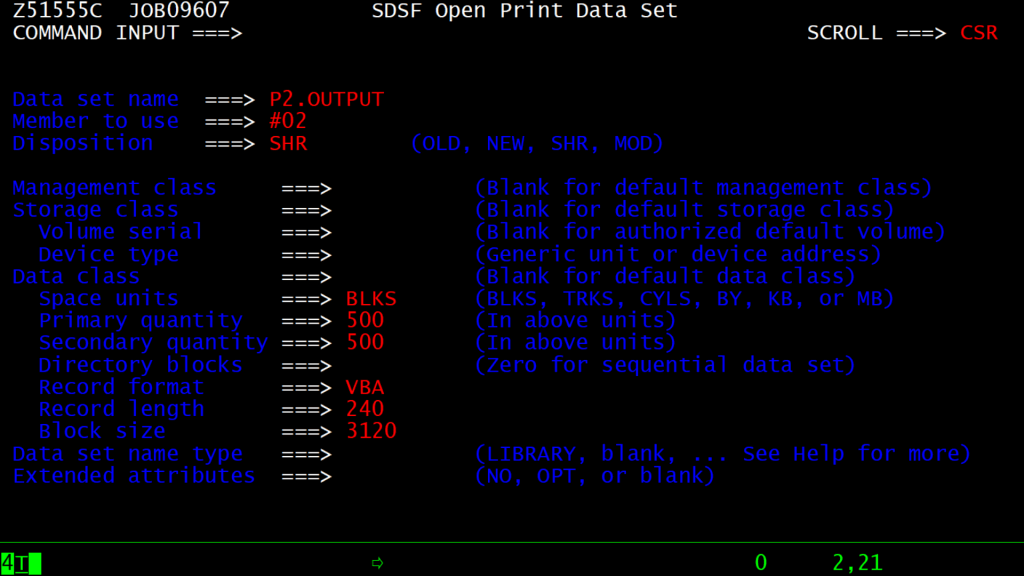
Notice the first 3 lines. Make sure they are correct and have the below values:
Data set name ===> P2.OUTPUT
Member to use ===> #02
Disposition   ===> SHR
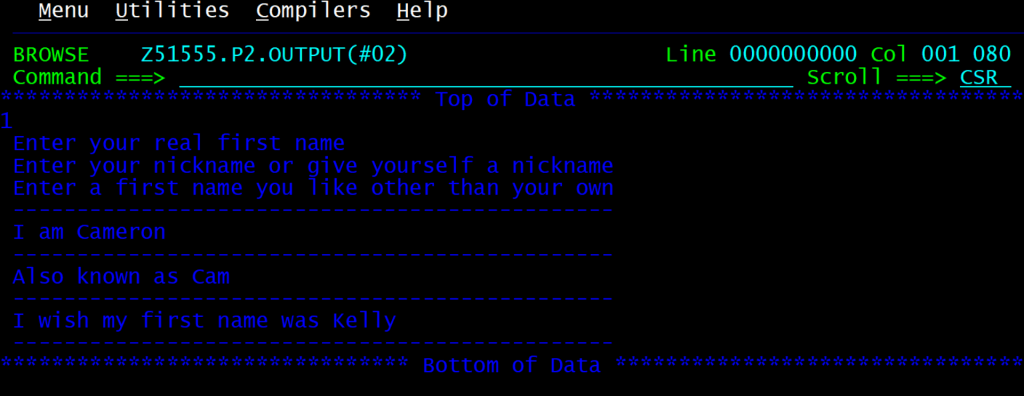
Now just press the ENTER key and then go to the dataset P2.OUTPUT. In this dataset, you have to browse the member #02.

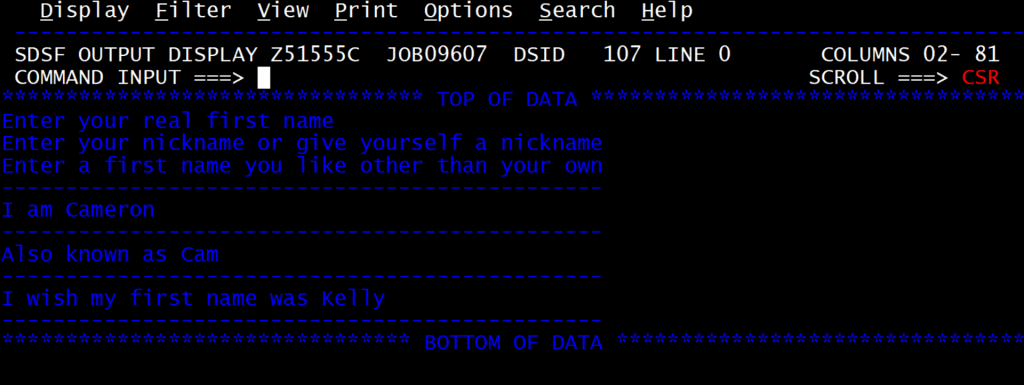
If the dataset contains the below data then your challenge was successful.
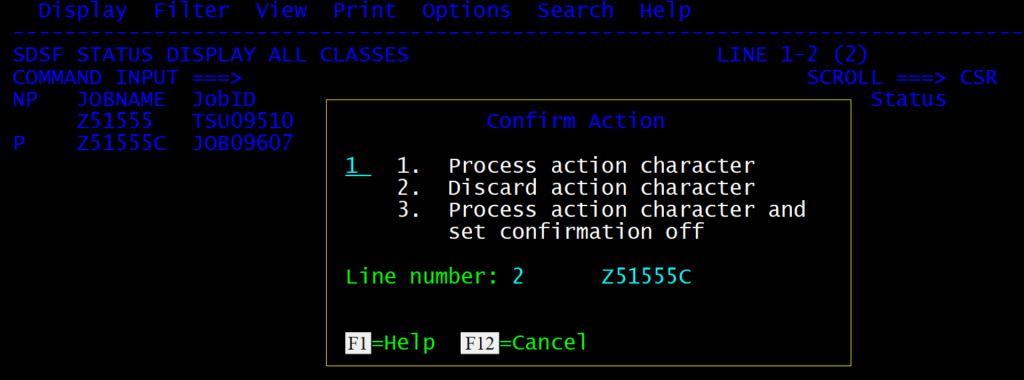
Purge jobs in SDSF
We can Purge jobs by giving P in front of it.


That is it !!!
Part 2 Challenge 2 is now complete.
In the next post, we will solve Part 2 Challenge 3.
See you there !!!
Leave a Reply